Spring Boot simplifies Java development by providing an auto-configuration framework and embedded servers, making it easy to create stand-alone, production-ready applications. This guide expands on packaging and running Spring Boot applications to include deployment strategies, covering key commands, best practices, and practical examples.
Essential Commands for Spring Boot Development
(Previous commands remain the same as the prior response, and are included here for completeness):
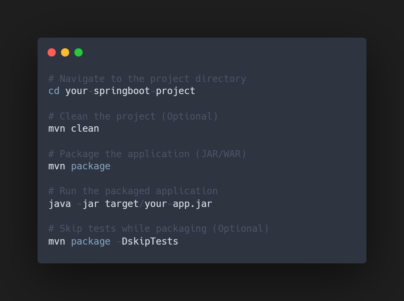
1. Navigate to the Project Directory
cd your-springboot-project: This command navigates your terminal to the root directory of your Spring Boot project.
2. Clean the Project (Optional)
mvn clean: This command (using Maven) cleans the project by removing thetargetdirectory.
3. Package the Application (JAR/WAR)
mvn package: This command packages your Spring Boot application into an executable JAR file.
4. Run the Packaged Application
java -jar target/your-app.jar: This command executes the packaged JAR file.
5. Skip Tests While Packaging (Optional)
mvn package -DskipTests: This command packages your application but skips the execution of unit tests.
Enhancing Your Workflow: Deployment Strategies
Beyond simply running the JAR file, deploying a Spring Boot application involves making it accessible to users or other systems. Here are a few common deployment strategies:
1. Deploying to a Cloud Platform (Example: Heroku)
Cloud platforms offer a scalable and managed environment for deploying applications. Here’s a simplified example of deploying to Heroku:
- Prepare your application:
- Create a
Procfilein the root of your project with the following line:web: java -jar target/*.jar(This tells Heroku how to run your application). - Ensure your application is configured to listen on the port specified by Heroku (you can access this via an environment variable).
- Create a
- Install the Heroku CLI: Follow the instructions on the Heroku website.
- Create a Heroku app:
heroku create - Push your application:
- Initialize a Git repository (if you haven’t already):
git init - Add your files:
git add . - Commit:
git commit -m "Deploy to Heroku" - Push to Heroku:
git push heroku main
- Initialize a Git repository (if you haven’t already):
2. Deploying with Docker (Example)
Docker allows you to containerize your application, making it highly portable and consistent across different environments.
- Create a
Dockerfile:
Dockerfile
FROM openjdk:17-jdk-slim  # Use a suitable base image

WORKDIR /app

COPY target/your-app.jar /app/app.jar

EXPOSE 8080  # Expose the port your application uses

CMD ["java", "-jar", "/app/app.jar"]
- Build the Docker image:
docker build -t my-springboot-image . - Run the Docker container:
docker run -p 8080:8080 my-springboot-image(This maps port 8080 on your host to port 8080 in the container).
3. Deploying to a Traditional Servlet Container (WAR)
If you’ve packaged your application as a WAR file, you can deploy it to a servlet container like Tomcat or Jetty.
- Copy the WAR file: Copy the WAR file (e.g.,
your-app.war) to thewebappsdirectory of your Tomcat installation. - Start Tomcat: Start or restart your Tomcat server. Tomcat will automatically deploy the WAR file.
Code Example: Setting the Port (for Heroku or similar)
Java
import org.springframework.boot.SpringApplication;
import org.springframework.boot.autoconfigure.SpringBootApplication;
import org.springframework.boot.web.servlet.support.SpringBootServletInitializer;
import org.springframework.boot.builder.SpringApplicationBuilder;
import org.springframework.beans.factory.annotation.Value;
import org.springframework.boot.CommandLineRunner;

@SpringBootApplication
public class MyApplication extends SpringBootServletInitializer implements CommandLineRunner {

    @Value("${server.port:8080}") // Get port from environment variable or default to 8080
    private int port;

    @Override
    protected SpringApplicationBuilder configure(SpringApplicationBuilder application) {
        return application.sources(MyApplication.class);
    }

    public static void main(String[] args) {
        SpringApplication.run(MyApplication.class, args);
    }

    @Override
    public void run(String... args) throws Exception {
        System.out.println("Application running on port: " + port);
    }
}
Key Improvements and Considerations
- Deployment Strategies: Added examples for deploying to cloud platforms (Heroku), Docker, and traditional servlet containers.
- Code Example: Included a code snippet to dynamically set the port based on an environment variable, which is crucial for cloud deployments.
- Expanded Best Practices: Briefly touched upon
Procfilefor Heroku andDockerfilefor Docker.
This enhanced guide provides a more complete picture of the Spring Boot development lifecycle, from packaging and running to deploying your applications in various environments. Remember to consult the official documentation for each platform for the most accurate and up-to-date instructions.
Keywords: Spring Boot, Java, Maven, Gradle, JAR, WAR, Package, Run, Deploy, Application, Spring Boot Application, Embedded Server, Tomcat, Build Tool, Development, Deployment, Testing, Skip Tests, Spring Boot Maven Plugin, Application Properties, Profiles, Logging, Production Deployment, Docker, Cloud Platforms, AWS, Azure, GCP.